AmLogic s805x GXL SoC board bring up
A full bring-up log of a custom AmLogic s805x (GXL) board: U-Boot, kernel and DTB, USB burning tool, HDMI, audio, Ethernet, I2C RTC and power measurements.
One of my previous projects was the bring-up of a newly developed board based on the AmLogic s805x (GXL) SoC. I will describe what the bring-up process looks like and what was tested, and we will also take a look at how flashing an AmLogic board works on the GXL platform (G12B and newer are very similar).
This is our board:
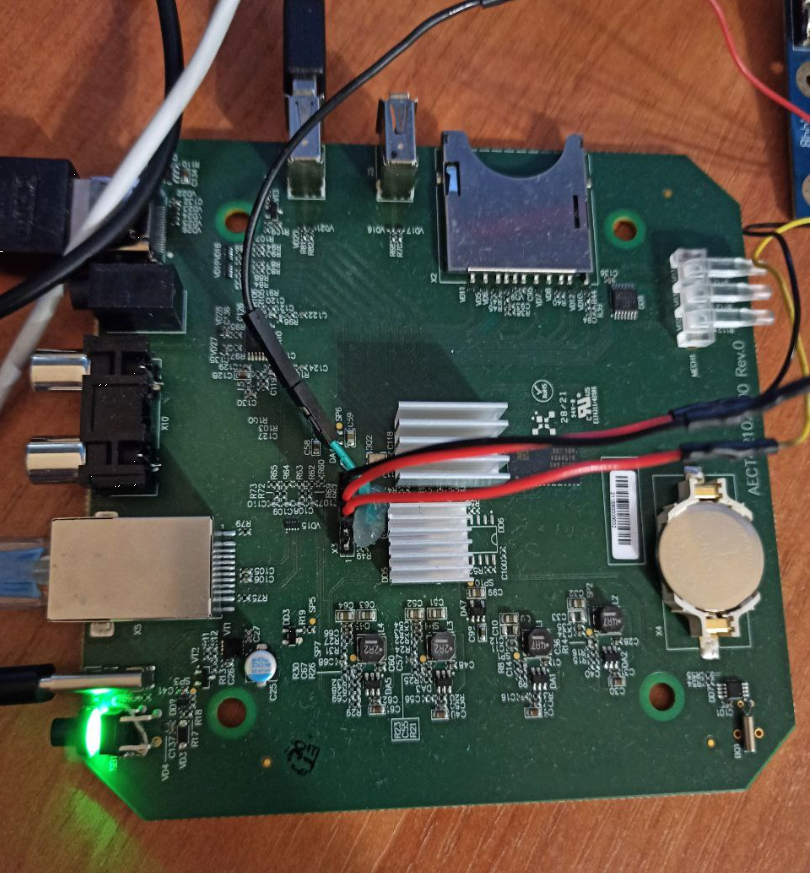
The first stage of a bring-up is to build an image for the reference board. In our case that is p241, and we took the a113 sources for it. Building the p241 reference sources:
Build the image
# You need arm-linux-gnueabihf-gcc and aarch64-linux-gnu-gcc to be installed in system toolchains
$ sudo apt-get install zlib1g zlib1g-dev
$ source buildroot/build/setenv.sh
# Choose "mesongxl_p241_32_kernel49" // option 37
$ ln -s aml-4.9 kernel/aml-3.14
$ ln -s aml-4.9 hardware/aml-3.14
$ make
Once the process is complete, everything ends up in output/mesongxl_p241_32_kernel49/images, with the following parts:
boot.img— the kernelu-boot.bin— the U-Boot imagerootfs.ext2— the root filesystemgxl_p241_v2_1g_buildroot.dtb— the DTB (flashed to the dtb partition throughdtb.img)
Flash the image
The second step is flashing everything to the MMC. The easiest way is to use the AmLogic flashing tool, the AmLogic USB Burning Tool:
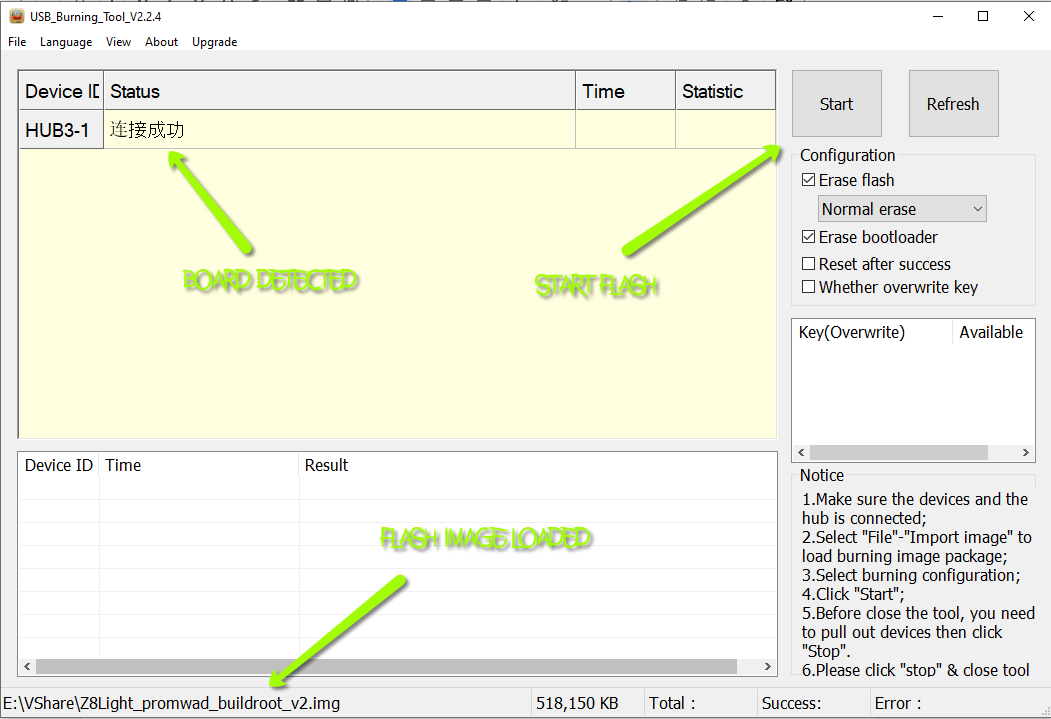
You have to select the full image you built.
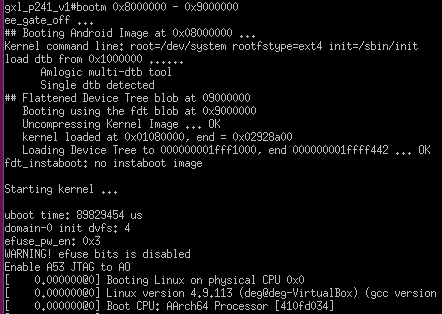
If everything is fine, you will see U-Boot loading and the kernel starting after it:
Control and test the LEDs
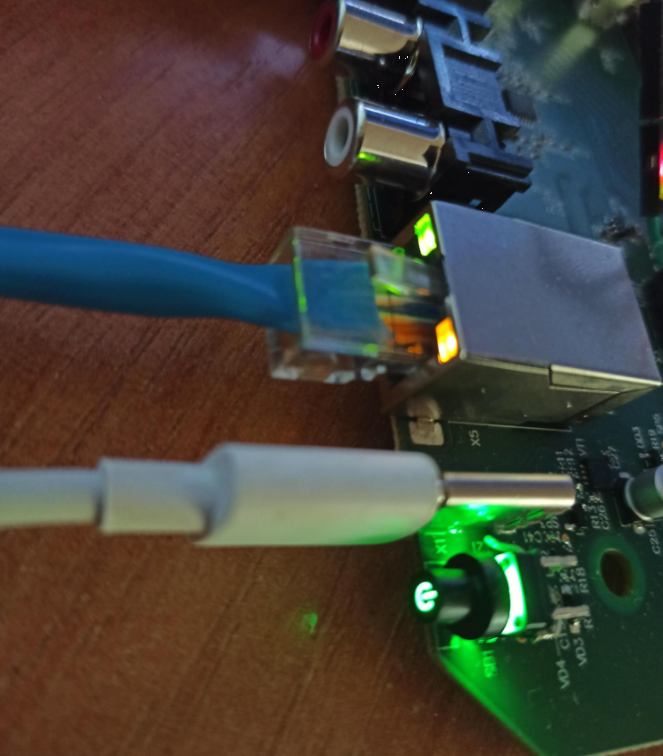
In our case everything booted, but some parts needed additional verification. The first one was the Ethernet LEDs, which did not work. How do we blink them from the kernel?
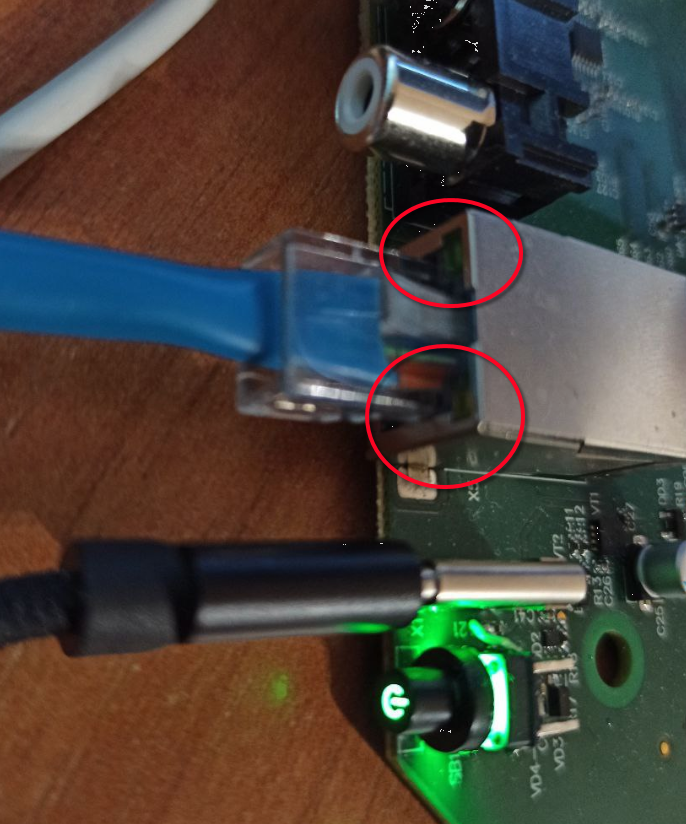
That’s pretty easy — drive the Ethernet LEDs through their GPIO state:
# It can be re enabled manually using control GPIO commands:
# GPIO (401 + 14) - green
# GPIO (401 + 15) - yellow

Z8# echo 415 >/sys/class/gpio/export
Z8# echo 416 >/sys/class/gpio/export
Z8# echo out >/sys/class/gpio/gpio415/direction
Z8# echo out >/sys/class/gpio/gpio416/direction
Z8# echo 1 >/sys/class/gpio/gpio415/value
Z8# echo 1 >/sys/class/gpio/gpio416/value
We set the GPIO direction and write 1 to the value.
Fix the battery-backed clock by enabling the DS1307 driver
The second problem was that the battery clock did not work out of the box. Let’s enable it. We use a DS1307 controller, so let’s apply the following patch:
diff --git a/arch/arm/configs/meson64_a32_defconfig b/arch/arm/configs/meson64_a32_defconfig
index 8e7d5648501a..446e1973c554 100644
--- a/arch/arm/configs/meson64_a32_defconfig
+++ b/arch/arm/configs/meson64_a32_defconfig
@@ -593,3 +593,4 @@ CONFIG_ASYMMETRIC_PUBLIC_KEY_SUBTYPE=y
 CONFIG_X509_CERTIFICATE_PARSER=y
 CONFIG_CRC_T10DIF=y
 CONFIG_CRC7=y
+RTC_DRV_DS1307=y
diff --git a/arch/arm64/boot/dts/amlogic/gxl_p241_v2_1g_buildroot.dts b/arch/arm64/boot/dts/amlogic/gxl_p241_v2_1g_buildroot.dts
index bf77a30db461..ba45803a8552 100644
--- a/arch/arm64/boot/dts/amlogic/gxl_p241_v2_1g_buildroot.dts
+++ b/arch/arm64/boot/dts/amlogic/gxl_p241_v2_1g_buildroot.dts
@@ -1359,3 +1359,14 @@
        delay_control = <0x15>;
        ssctl = <0>;
 };
+
+&i2c0 {
+       status = "okay";
+       pinctrl-0 = <&a_i2c_master>;
+       pinctrl-names = "default";
+
+       rtc: rtc@68 {
+               compatible = "dallas,ds1340";
+               reg = <0x68>;
+       };
+};
diff --git a/arch/arm64/configs/meson64_defconfig b/arch/arm64/configs/meson64_defconfig
index 968ee40827bc..1367a6cebd19 100644
--- a/arch/arm64/configs/meson64_defconfig
+++ b/arch/arm64/configs/meson64_defconfig
@@ -617,3 +617,4 @@ CONFIG_CRYPTO_GHASH_ARM64_CE=y
 CONFIG_CRYPTO_AES_ARM64_CE_BLK=y
 CONFIG_CRC_T10DIF=y
 CONFIG_CRC7=y
+RTC_DRV_DS1307=y
And now let’s test it with i2cdump:
i2cdump -f -y 0 0x68
Sound testing
We did this with speaker-test, which is part of the image:
# via audio jack
Z8# speaker-test -c2 -D hw:0,0
# via hdmi SPDIF
Z8# speaker-test -c2 -D hw:0,1
Load testing
Let’s load the system to 100%. One of the most effective ways is with bzip2:
Z8# (dd if=/dev/urandom | bzip2 -9 >> /dev/null &); (dd if=/dev/urandom | bzip2 -9 >> /dev/null &); (dd if=/dev/urandom | bzip2 -9 >> /dev/null &); (dd if=/dev/urandom | bzip2 -9 >> /dev/null &)Let’s increase the load further with more bzip2 processes plus hardware-decoded playback:
Z8# (dd if=/dev/urandom | bzip2 -9 >> /dev/null &); (dd if=/dev/urandom | bzip2 -9 >> /dev/null &); (dd if=/dev/urandom | bzip2 -9 >> /dev/null &); (dd if=/dev/urandom | bzip2 -9 >> /dev/null &)
Z8# (dd if=/dev/urandom | bzip2 -9 >> /dev/null &); (dd if=/dev/urandom | bzip2 -9 >> /dev/null &); (dd if=/dev/urandom | bzip2 -9 >> /dev/null &); (dd if=/dev/urandom | bzip2 -9 >> /dev/null &)
Z8# gst-launch-1.0 filesrc location=videoplayback.mp4 ! qtdemux ! h264parse ! amlvdec ! amlvsink

## Verify with top
Z8# top
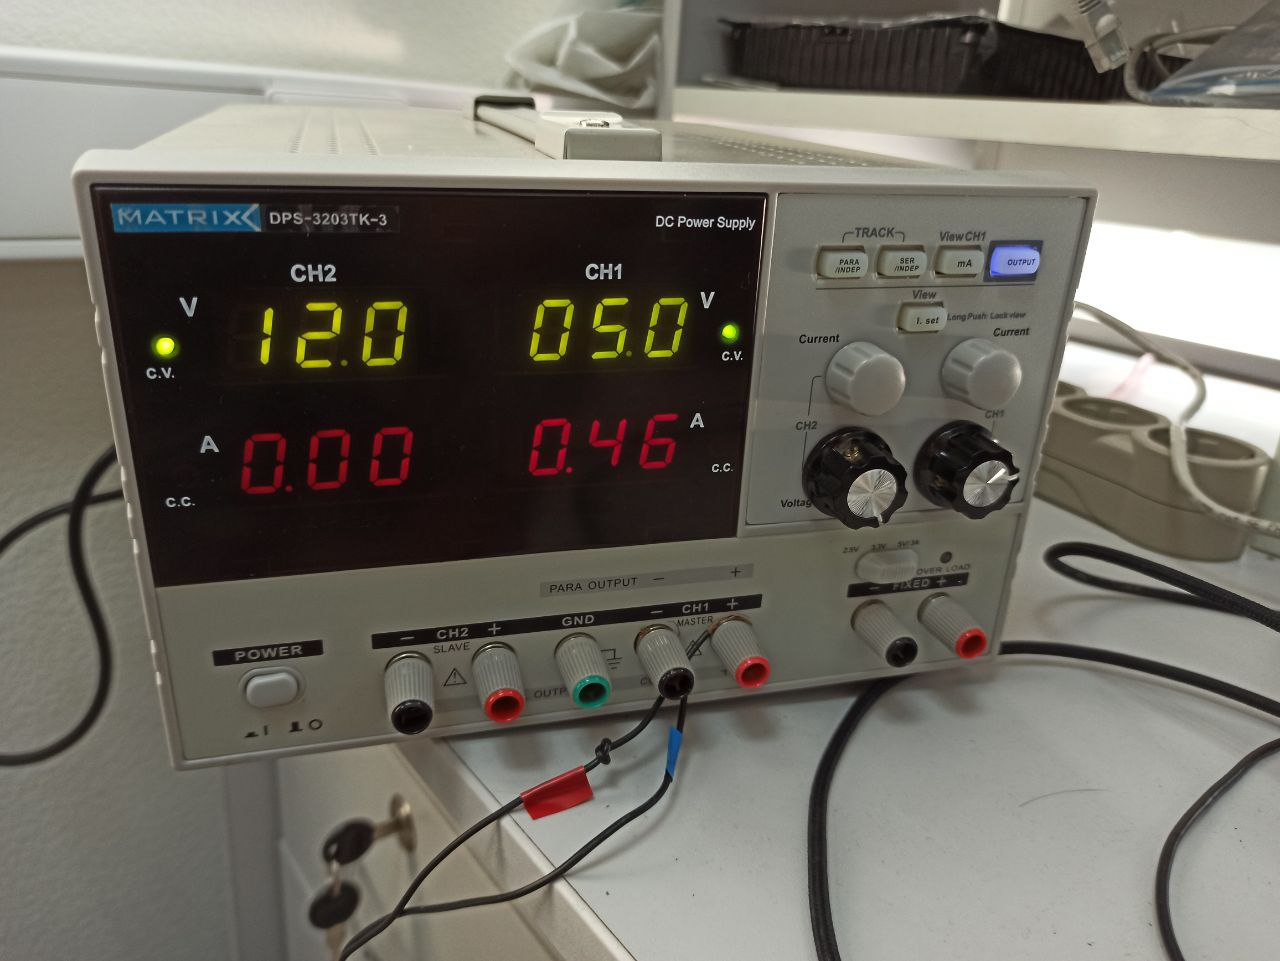
The maximum power consumption we measured is 0.46 A.
Hardware accelerated decoding
Hardware accelerated H264 video
Z8# gst-launch-1.0 filesrc location=videoplayback.mp4 ! qtdemux ! h264parse ! amlvdec ! amlvsinkgst-launch-1.0 starts decoding the video, so you can watch the decoded stream. If the screen is occupied by the browser, free it first:
Z8# killall chromeHardware accelerated audio
Z8# gst-launch-1.0 filesrc location=1.mp3 ! mpegaudioparse ! amladec ! audioconvert ! amlasinkTemperature measurements
Z8# cat /sys/class/thermal/thermal_zone*/tempPlay an audio file
Z8# aplay -D hw:0,0 -c2 -f cd flower_ok.wavMounting USB drives
Z8# mkdir /media/flash
Z8# mount -t vfat /dev/sda /media/flash
Z8# cd /media/flash
HDMI tests
We simply plugged a monitor in to verify that everything works :).